Settings and sharing
How to make the dashboard fit the home: its style, which rooms it shows, where its tile appears in Crestron Home, your branding, the energy set-up, and the links you hand over. Settings is in the installer view, and has these sections: Appearance, Crestron Home tile, Branding, Energy and Alert settings.
Styles
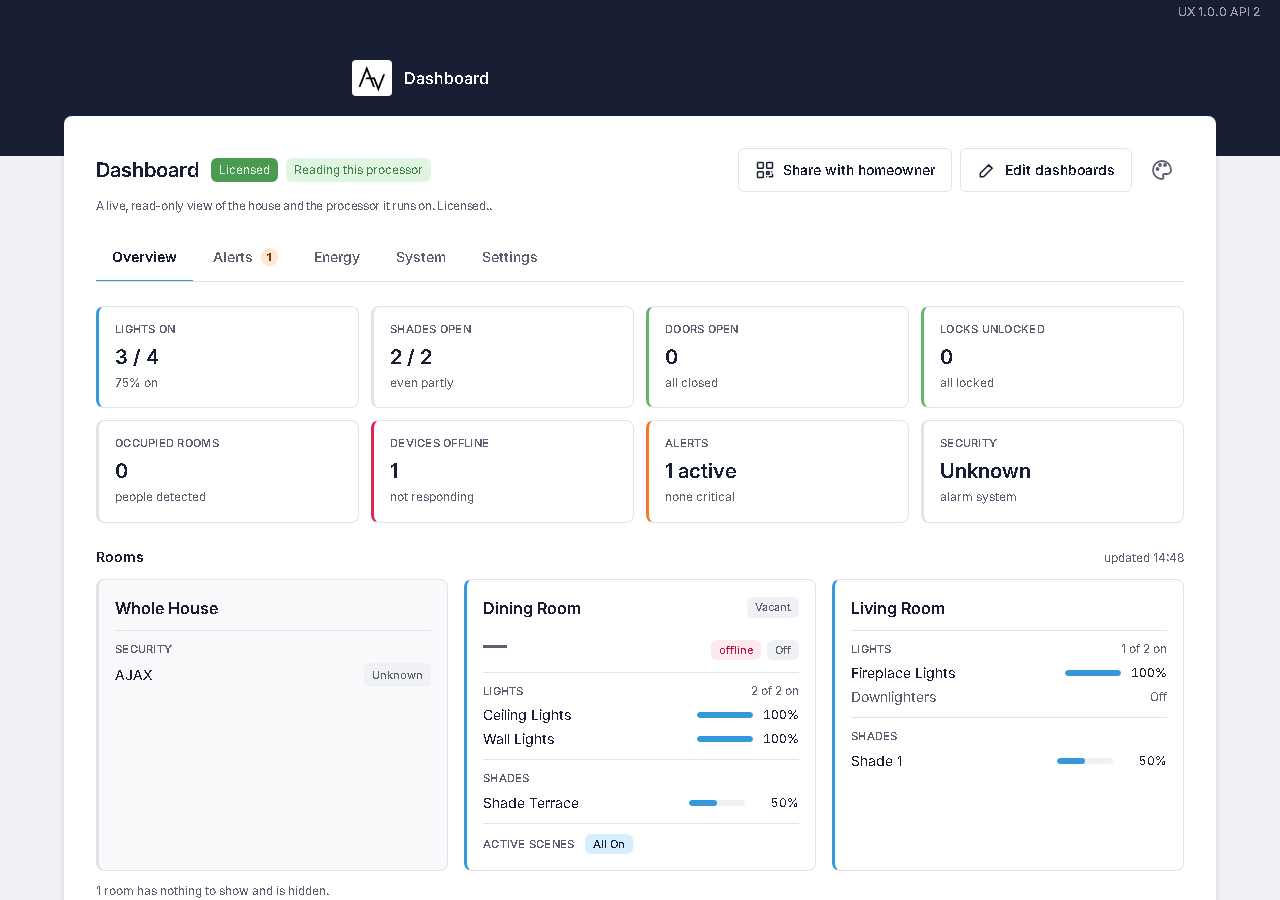
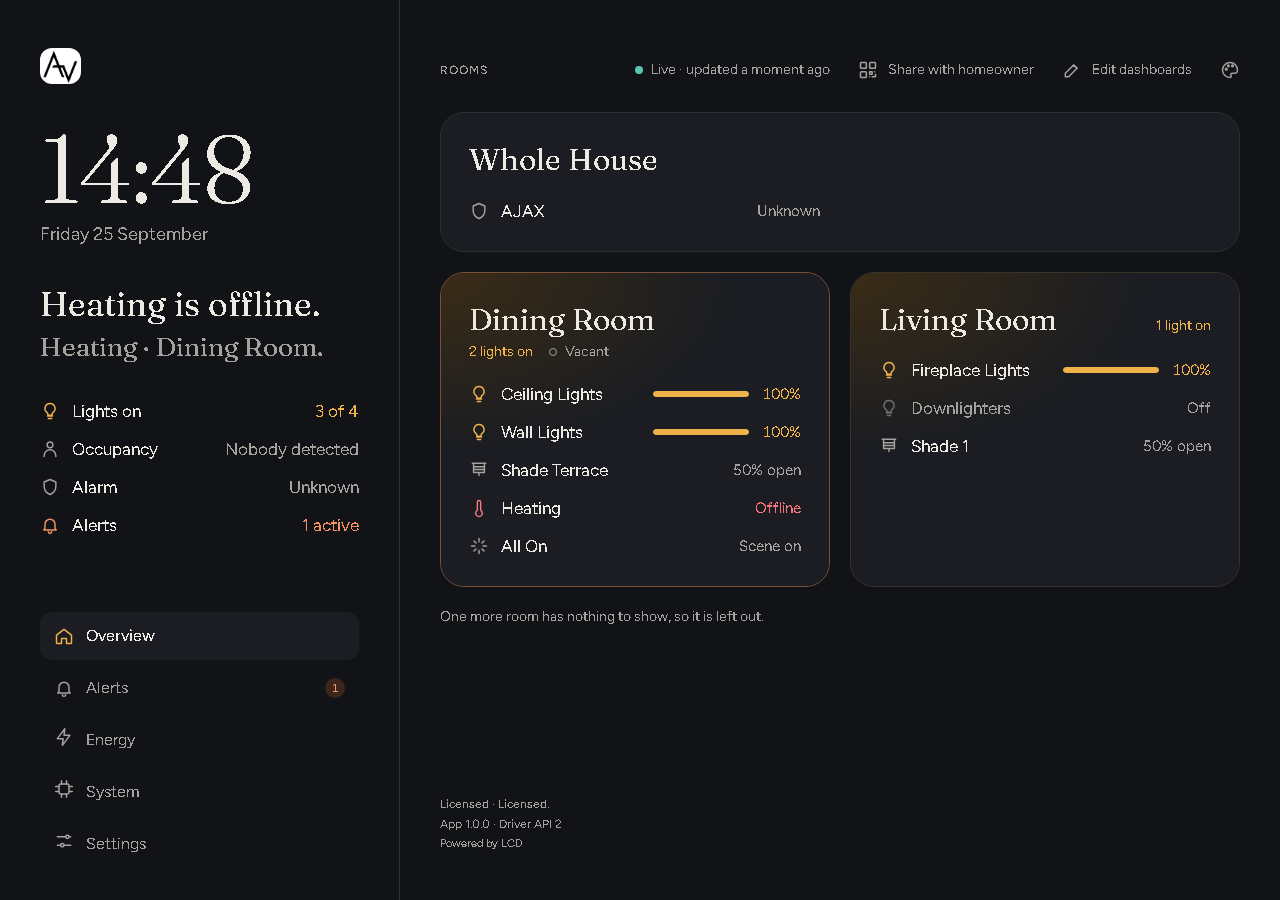
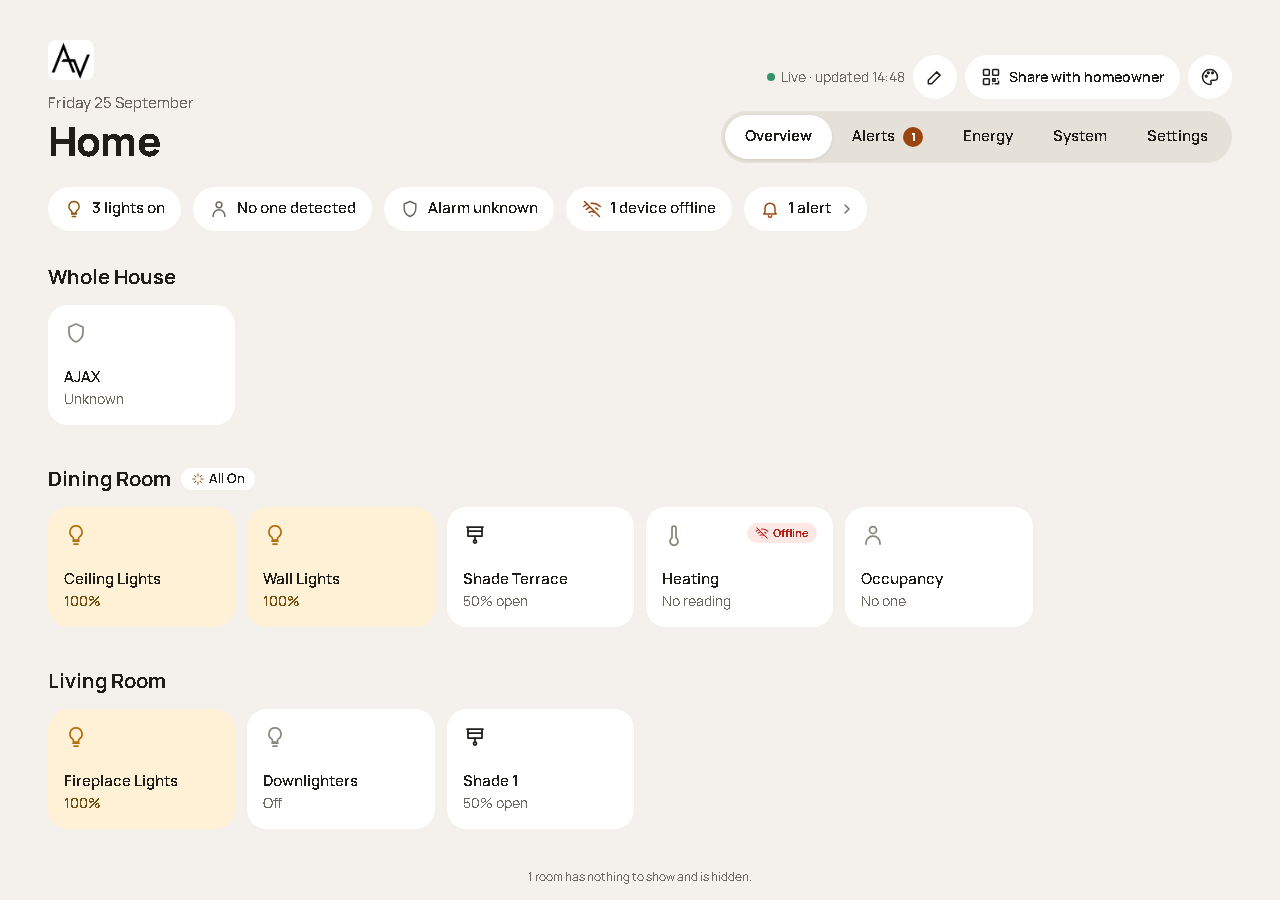
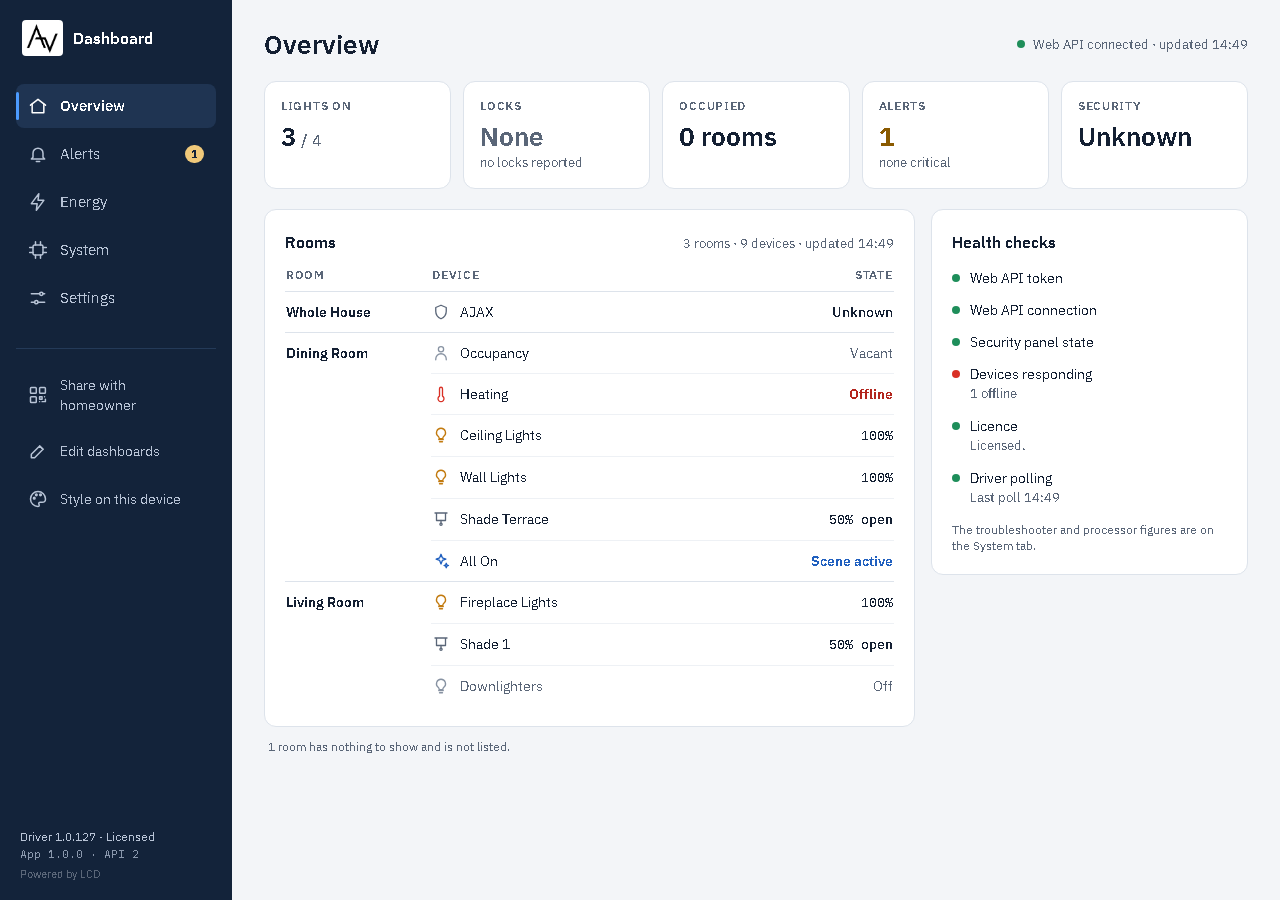
The dashboard comes in four styles. They show the same information in different layouts.
| Style | Looks like | Suits |
|---|---|---|
| Classic | The original LCD layout: light, clear and detailed. | Installers, desktop browsers |
| Ambient | Dark and calm: the time, a sentence about the house, and the rooms. | Wall tablets and bedside displays |
| Glance | Light and familiar, with a tile for every device, grouped by room. | Homeowners' phones |
| Console | Dense, in LCD navy, with a side menu on wide screens. | Installers and technical users |
The same house in each style:
Classic
Ambient
Glance
Console
Choosing a style
A style can be set in three places. The first one that applies wins:
- The link. A link or QR code can carry a style. Set it in Share with homeowner under Style for this link. Use this for a wall tablet that should always open in Ambient.
- This device. Anyone can pick a style for the phone or tablet in their hand with Style on this device. The browser remembers it. Use default goes back to the installer's choice.
- The installer's default. In Settings → Appearance, choose a default for the Homeowner view and one for the Installer view, then select Save appearance. Out of the box the homeowner view uses Ambient and the installer view uses Classic.
The defaults are stored on the processor and survive restarts and driver updates.
Room filters
A room filter shows only some rooms, for example the children's rooms on a tablet in the playroom. With a filter on:
- the summary counts only the chosen rooms;
- the Energy page covers only the chosen rooms;
- alerts for other rooms are hidden, and alerts for the whole house still show, such as a security alarm or a processor problem;
- Whole House devices show only if Whole House is one of the chosen rooms.
There are two ways to set one.
- On one device. Open Style on this device and pick rooms under Rooms on this device. The browser remembers them. A bar on the page shows the filter, with Show all to clear it.
- In a link. In Share with homeowner, pick rooms under Rooms for this link. The link and QR code open with those rooms, on any phone that scans them.
A link's rooms override a device's own filter. If the rooms in a link have been renamed or removed, the dashboard says so and offers Show all rooms.
Crestron Home tile
The driver adds a Dashboard tile to the Crestron Home app. Under Crestron Home tile, choose where it appears:
- Show on the Home page
- Show on the room page, the page of the room you added the driver to.

Both are on to start with. Each tick saves as soon as you change it, and the tile moves straight away. With both off, the tile doesn't appear anywhere in the Crestron Home app. The dashboard still opens from its link or QR code.
Branding
In Settings → Branding, add your details so the homeowner knows who installed the system and how to reach you:
| Field | Notes |
|---|---|
| Logo | PNG, JPEG or WebP, up to 256 KB. The dashboard resizes it to 512 px on the longest side. A wide logo on a transparent background works best. Select Upload logo. |
| Company name | Up to 60 characters. |
| Support phone | Up to 30 characters. |
| Website | An http:// or https:// address. |
| Support email | An email address. |
Select Save branding. Your logo and company name appear at the top of every style.
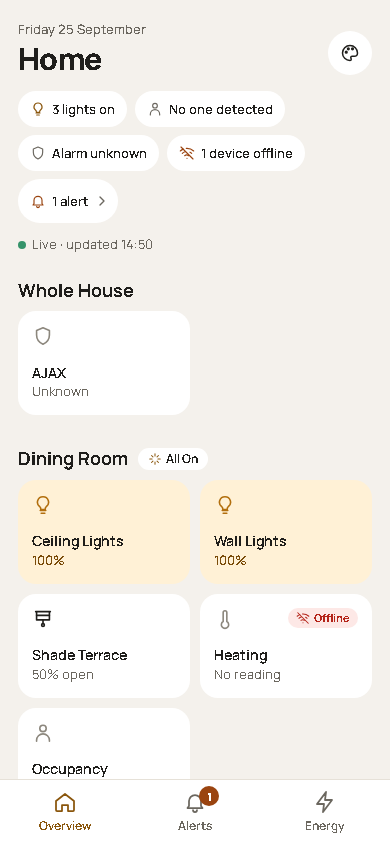
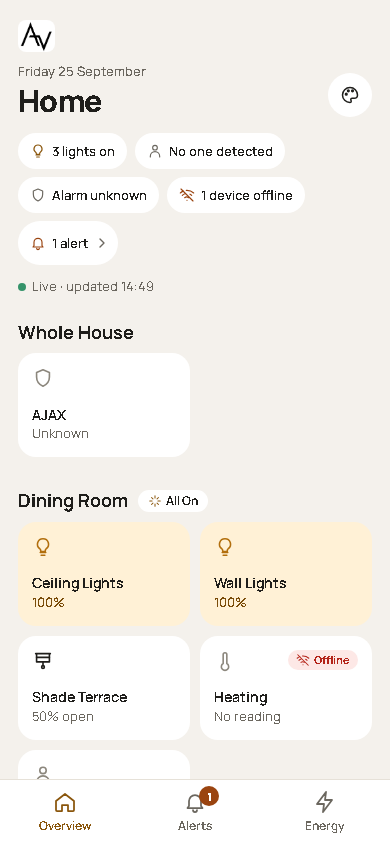
Without branding, the dashboard shows the LCD logo (left). With it, your logo takes its place (right). In the homeowner view, a Need help? line shows your support details. The printed handover card carries them too. A small Powered by LCD stays in the footer.
Energy setup
The Energy page estimates each light's energy from its dimmer level and its watts. In Settings → Energy, tell the dashboard your tariff and your loads.
Tariff and defaults
| Field | Notes |
|---|---|
| Tariff per kWh | The price of a unit of electricity, for example 0.245. Leave it empty to show kWh only, without cost. |
| Currency | The currency code, for example GBP or EUR. |
| Default dimmer watts | Used for any dimmed load without its own watts. 20 W to start with. |
| Default switch watts | Used for any switched load without its own watts. 20 W to start with. |
Select Save tariff and defaults.
Loads
Loads lists every light on the processor with its room. For each load you can set:
- Watts: the load's rated power, from 0 to 5000. Leave it empty to use the default.
- Type: LED, Incandescent, Fan or Other.
- Counted: untick a load to leave it out of the estimates.
To set several at once, tick them and use the bulk edit bar to apply the same watts or type. Then select Save loads.
A new value applies from the moment you save it. Earlier figures keep the watts that applied at the time.
Importing and exporting loads
For a large house, fill in the table as a spreadsheet:
- Select Export CSV to download the load table.
- Fill in the Watts, LoadType and Included columns in a spreadsheet.
- Select Import CSV… and choose the file (up to 1 MB).
Rows match by LoadId, then by Room and Name. Any row that matches no load is listed under Rows that matched no load, with its row number, so you can correct it and import again.
After a configuration upload
If uploading a Crestron Home configuration gives some lights new ids, their old entries are marked No longer on the processor. Where a new light has the same room and name, the dashboard suggests the match. Confirm each match to carry its watts and settings over, then save.
Sharing with the homeowner
Select Share with homeowner in the installer view. The dialog builds a link to the homeowner view. You can choose:
- Dashboard for this link: Standard views, or one of your saved dashboards, which brings its own style and rooms;
- Style for this link, or leave it on the homeowner default;
- Rooms for this link, or leave it on all rooms.
- Wall tablet, for a tablet that stays on the wall. See Wall tablets.
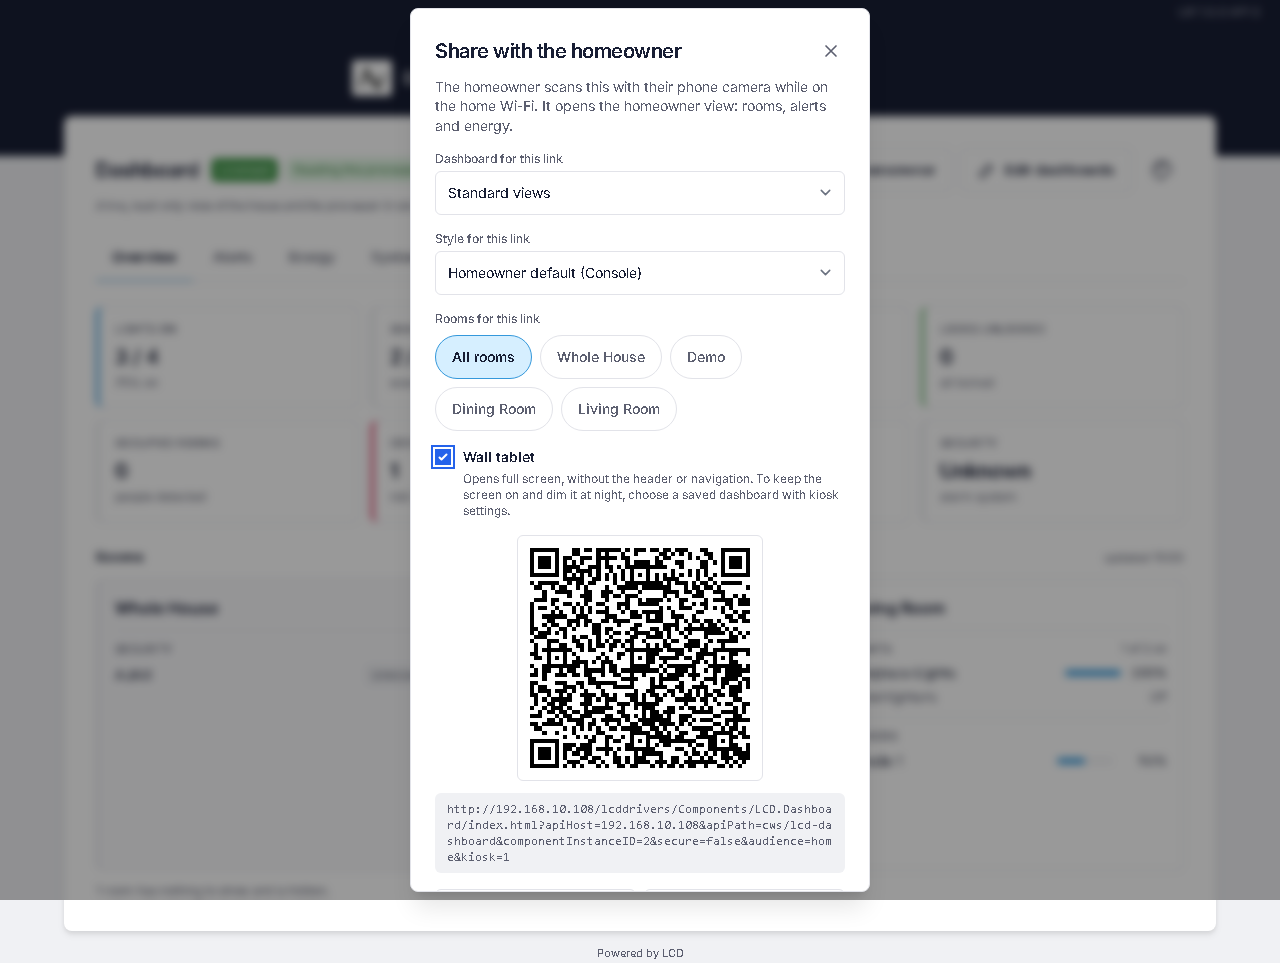
Then hand it over:
- the homeowner scans the QR code with their phone camera while on the home Wi-Fi;
- Copy link to send it by message or email;
- Print handover card for a card with the QR code, your logo and support details;
- Download QR (PNG) to add the code to your own handover pack.
The link uses the dashboard's fixed address, so it keeps working after a reboot, and after the device is removed and added again.
Make one link per purpose: a whole-house link for the homeowners' phones, a saved dashboard for the kitchen tablet, and a filtered link for each bedroom display. For a tablet on the wall, see Wall tablets.
The homeowner view shows Overview, Alerts and Energy. It doesn't restrict access: anyone on the home network with the installer link can open the installer view. See Limitations.